Wednesday, April 27, 2011

Spring is (nt) in the air! Projects and "How To" fabric flowers!

One day again we will be able to have our windows open and play outside!  But I guess the dull weather allows me to have a little more time to do inside projects and post them here!:)

First let me start off by saying that IM NOT thrilled about converting Carter's room to a "Big Boy" room.  Makes me tear up.  But...with his 2nd birthday coming up in less then 2 months I gotta do something.  So my first project are these pictures.  I bought the canvas at Hobby Lobby, I think it was $8 for all 4.  Spray painted them with Krylon Banner Red.  Then just used acrylic white paint for the hand and foot prints.  The process of doing the prints was a DISASTER!  I stripped him down, put him in the tub and painted one at a time his feet and hands.  Trying to keep him from doing his own artwork on the tile in the shower was pointless.  Thank GOD that the white paint could be wiped off because we has a few mistakes and movements of limbs.  Lets just say this is a TWO person job and have a glass of wine ready when you are finished!!  You will need it!....or 2!  But I loved how it turned out and cant wait to hang them up!


A couple of people wondered how to make the fabric flowers I have been using...they are so simple but do take a few times to get them right. Or at least it did for me.  There isnt a right or wrong way, just take your time and see what you like.  Also...I bought a bunch of different patterns of fabric and is much cheaper to buy it by the yard then "fat quarters".  If you buy 1/2 a yard you can get about 6-7 large flowers.

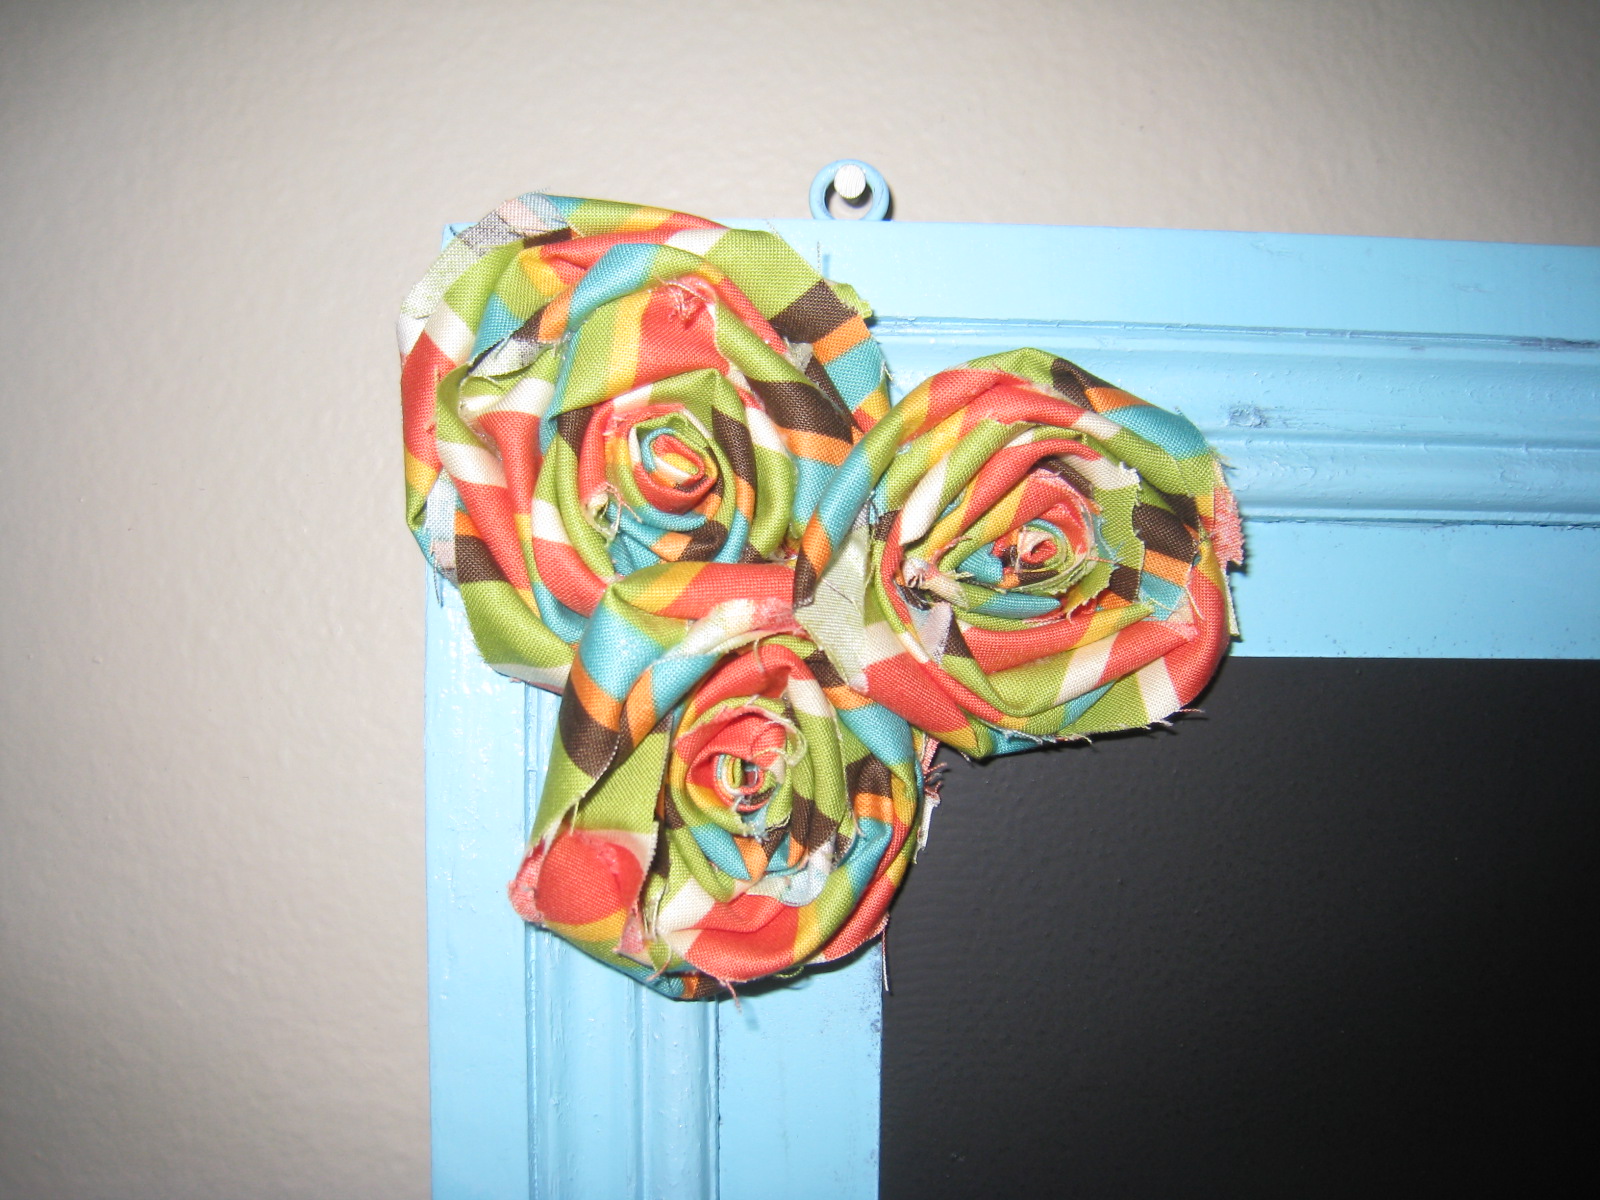
Here is what you will need.  Fabric glue, scissors, fabric!  Dont worry about the pattern on the fabric, you wont see much of that.  Pick out a fabric with the colors you like rather then pattern.


First cut your fabric strip into a 1 inch piece.  You can use as long or short of a piece you want.  Shorter-smaller flower.  Longer-bigger flower.

Next fold in the one side, then fold over the other side.
Next you will start rolling the end of the fabric...about 6-8 times.

Then along the fabric run a thin line of glue...this is when you will start twisting the fabric around the "roll".

I like to twist mine alittle looser so it looks alittle more "fluffy".  Does that make sense?  Hope so!

My fabirc doesnt stayed folded the way it was which is fine and gives the fabric a "not so perfect" look.  Keep twisting and put alittle glue every pass or so around.
Then when you are dont just glue the end.  See easy!!

This is a bigger flower.  In the next picture you can see the difference in the shorter vs longer fabric.


Next project is still in the process.  I had leftover fabric from the bulletin board that I made a couple weeks ago.  And I have been needing to recover my dining room chairs because they are a puke beige.  So I had enough leftover fabric to recover one to see if I liked it.  And I did!  So now I need 2 more yards so I can finish what I started!  But here is the chair I did this morning!

Before...blah.  Whoever designed these chairs to be covered in puke beige microfiber needs to be slapped.


During.....
AFTER!!!!

This next chair I just finished.  I bought it at a auction for $4.  Sanded the heck out of it, primed it and painted it with Krylon Blue Ocean Breeze.
Before
After!

The last one I just did because I needed something for this little vase and needed something NOW.  I like it because it was free!:)  Who knew that painted dead sticks from the yard could look so good!!


Last but certainly not least....my little "helper"!!

Wednesday, April 20, 2011

A few more projects and some randoms....

 <a href="http://tipjunkie.com/" target="_blank"><img src="http://www.tipjunkie.com/images/TipMeTuesdayButton1.png" alt="Tip Junkie handmade projects" border="0"/></a>

With all of these rainy days Im being pretty good about uploading some pictures.  So here are a few projects that I have done with in the last month or so.

First is just a simple grapevine wreath that I bought I Joanne Fabrics for $3 and hot glued some of the fabric flowers that I made.....SUPER easy Spring wreath!  (No I dont have it hanging on my cabinet door all the time, just for picture taking!:)


I finished my laundry room this week.  I added a shelf above the window and I love how it turned out.  The shelf was $6 at Lowes and the brackets were $5 a piece.  And on the shelves is my inspiration for the whole room, old blue Ball canning jars.  I LOVE the color of those!  I also bought a new hamper.  As I posted before spray painting my old one didnt work the best...it was flaking.  Also I wanted to open up the room alittle by getting the old one out of the way.  The new one works great and its not out in the middle of the room.  (NOTE: If you dont know this...if you have a front load washing machine you should always keep the door open when not in use.  This will prevent the mildew smell from happening.  Mine is only shut for picture purposes:)


All done!


This next dresser I had bought a few years ago for my condo, since moving it has been in my basement full of junk.  This project was the start of my spray painting obsession.  It was just oak before and it went black.  I primed it first with Kilz spray and then 3 cans of Krylon Gloss black.  I have learned when you prime something first, "gloss" really isnt gloss...its more semi-gloss.  Not sure why that happens but I like it.  Now its a end table in my living room!  (Note: Thanks to our Beagle, when he was a puppy,  the bottom basket will never be the same! Grrr!)


This end table in my bedroom I found at a garage sale last week for $5!!  It was already stripped so someone already did the nasty work!  Thanks!  I primed it with Kliz and 1 can of gloss white Krylon.  Love!


This next piece I just LOVE and almost had a heart attack getting it.  I learned that Im NOT made for auctions.  My blood pressure had to be threw the roof while I was bidding.  I paid alittle more then what I had said I was going to.....it ended up costing me $75.  BUT....it was already painted red for me and that was a huge plus!  On the dresser the big red frame I bought at the What Cheer flea market last year and paid $5 for it.....it is super old and it was falling apart, but alittle spray paint is keeping it all together.


The next book shelf Im still not sure about.....I bought it at the What Cheer flea Market last fall.  I paid $45 for it.  It was painted flat back and was rubbed off and underneath was a rust color.  I didnt like the rust color so I painted it all flat black.  Then last month when this spray painting bug took me over I sprayed it all gloss black.  Now its to shiny.  I didnt prime it first...if I would have a bet I would have liked it bc it wouldnt have been SO shiny.   I have toyed around with the idea of going back over it with a satin black and painting the back of the shelves a color or wallpapering them.  Not sure what Im going to do so at this time its staying this way.

Last up for today is my "chalk holder" for my chalk board door.....which is really just a drawer pull upside down.  Works great!  This idea came from www.pinterest.com, if you havent checked out that website you are missing out!!


Sunday, April 17, 2011

Cheap Paint!

So I was thinking another thing that would be a good addition to my blog would be deal finds.  Yesterday I was at Lowes in the paint department buying paint for my crown molding. (Yes it is FINALLY DONE!!!  WOOHOOOO)  I discovered "messed up" paints on a rack.  On this rack was was 1/2 pints for .75 cents and $5.00 gallons!!!  All Valspar paints....and if you know paints....Valspar is a GREAT paint but you also pay for it, usually $30+ for a gallon.  Now you cant be picky on colors or finishes but they really had a some good ones.  I bought a 1/2 pint of Turquoise for .75 cents.  Defiantly enough to paint something with!  So next time you are in need of some paint go check out Lowes!!  

One more thing....if you "like" Valspar paints on Facebook every morning at 9 am they give away 1000 1/2 pints of paint!  And you can choose your color.  But dont spend to much time choosing because they go FAST!  

Today I we finished the shelf above the window in the laundry room and I LOVE it!!!  Also a chalk holder on my chalk board door.  Pictures to come!

Friday, April 15, 2011

Finally some PICTURES!

Here are some projects that I have done within the past couple weeks.

First up is my pantry door!  I have been wanting to paint it with chalk board paint forever!  Finally got to it and I LOVE it...minus the dust!  I still need to get a chalk pen!  Primed it with Kliz Spray Primer and painted it with Rustoleum Chalk Board paint.
Here was just a small spray painting project....I bought this little high chair from the thrift store in my hometown for $6!  Carter loves it!:)  I primed it and spray painted it with my favorite color...Krylon Blue Ocean Breeze!
Above is a bulletin board that I made out of an old frame that I bought at a garage sale for $3, some cork board from Menards for $9 and fabric from Walmart for $6.  Painted it with Krylon Spray Paint in Ivy Leaf.  I love how it turned out and now I have a place for Carter's art!


Next is a old decoration that I had in my hallway to my laundry room....it was very country looking and didnt like it.  It was navy blue and red and said "Simplify".  Sorry no before pictures.  So I had some leftover spray paint from Carters doll highchair and spray painted it and went over the middle with chalkboard paint.  I have since written "Mueller" on it with chalk.  Then I added some flowers that I made out of fabric.


This next frame I LOVE.....I bought it at a store in Amana and it is very old.  I paid $24 for it and then had buyer remorse because I thought I way over spent!  But when I painted it and found a play in my bedroom for it I was so glad I bought it!  I spray painted it with the color the im obsessed with.....Krylon Blue Ocean Breeze.  The table is from the Whatcheer Flea Market and bought it last year.


Here is the Burlap wreath that I made out of 2 wire hangers and 2 yards of Burlap.  I also added a few of the fabric flowers.  Total cost was $6.


Just thought I would throw in a couple pics of our ongoing crown molding project in our kitchen....it still needs to be painted and caulked but I love how it looks and wish we would have done it 2 years ago!!

Before


After

This is the latest project in the Mueller house!  I woke up Monday morning and NEEDED to redo my laundry room!  It was dull and boring before.  I love the color...although bright!  The space looks so much bigger and happy!  I spray painted my hamper white (Which I DONT recommend bc its shedding now), the basket on the dryer black, added the "M" which I had, the shelf I had, and spray painted the empty frame white.  Now I just need to figure out what Im doing for the window....Im thinking of putting a long shelf above the window and putting a bunch of Ball blue jars up there.  Now all thats missing is a chandelier!!  Im on the search for a smaller crystal one.

Before

After

I bought this Ball mason jar from a flea market for $2....I had the pump from some old soap. Drilled a hole in the top, inserted the pump, and added some strong glue!  Viola! 


Well thats it for now!  I have been busy and have other projects going.....post more pictures when they are done!

Tuesday, April 12, 2011

Welcome to my blog!

I decided to start a blog....a couple years ago I had no idea what a blog was.  After many people asking for pictures or ideas on decorating I thought this would be a great way to post all of my creations in one place.  I have gotten very craft lately.....it just started out because I dont have the funds to buy everything that I want for my house.  Then it became a passion.   My mind is constantly spinning with ideas.  I will wake up in the middle of the night thinking about one and cant go back to sleep.  Im trying to become better at taking before and after pictures of my projects.  So some of my pictures that I will post are only the after.

Enjoy.....now Im just getting started so make sure you check back for more pictures!